hexo blog desc
- Hexo 是一个快速、简洁且高效的博客框架。Hexo 使用 Markdown(或其他渲染引擎)解析文章,在几秒内,即可利用靓丽的主题生成静态网页。
hexo install
- 安装 Node.js
在官方网站下载即可安装,链接如下
1 | https://nodejs.org/en/ |
- 安装 cnpm 或使用淘宝镜像(二选一)
1 | npm install -g cnpm |
- 安装 hexo
1 | npm install -g hexo-cli |
github pages and gitee pages open page services
-
1.github pages 开通使用
- 创建与 github 用户同名仓库,命名方式如下
如图
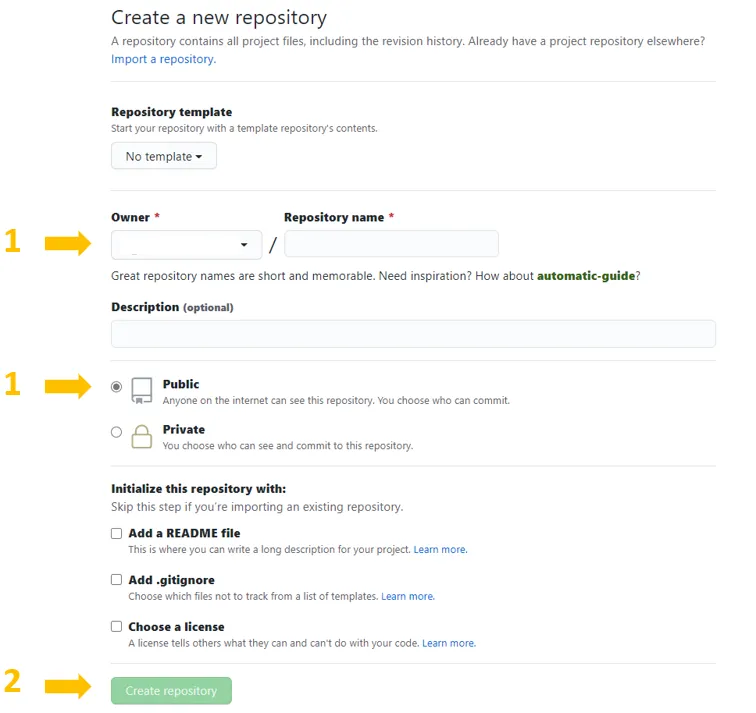
1
username.github.io
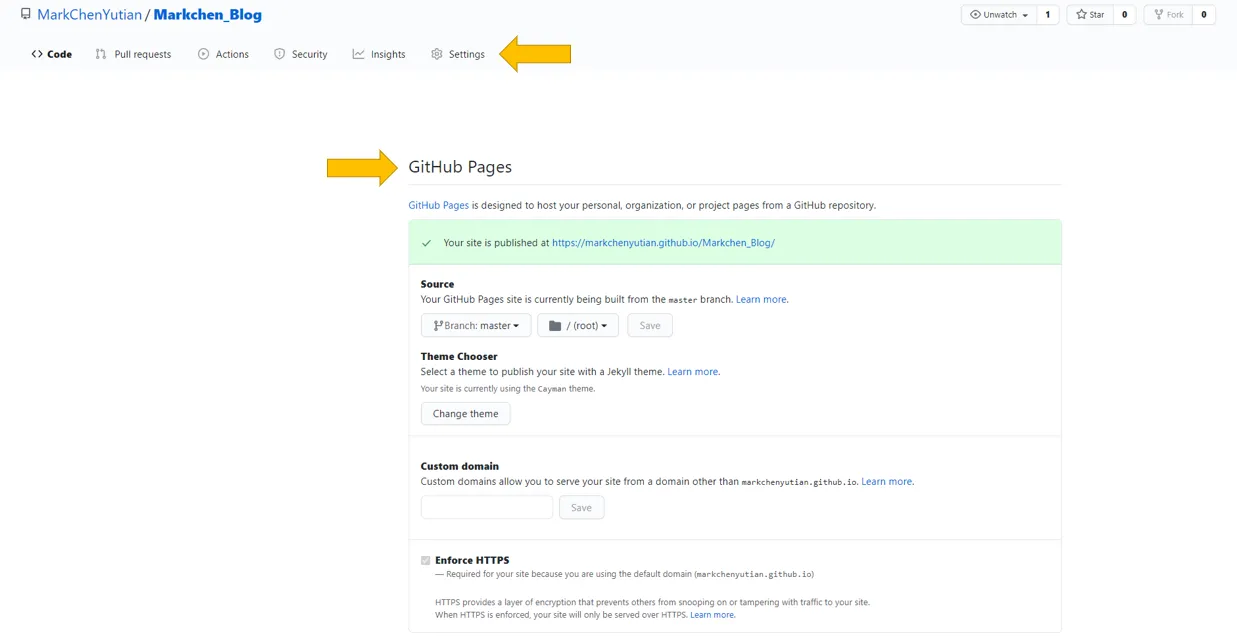
- 开启 github pages 服务
如图:
- 创建与 github 用户同名仓库,命名方式如下
-
2.gitee pages 开通使用
-
创建与空间名相同仓库
-
开通 pages 服务(需提前实名认证,较为复杂)
-
hexo config and themes use
- 1.在下载结束后,可以编辑 hexo 配置
- 配置文件
_config.yml
- 配置文件
1 | see @link |
hexo use
-
- blog 编写
1 | hexo new blog |
-
- blog md 文件 书写
采用 MarkerDown 语法
- blog md 文件 书写
macos use
1 | brew install hexo |
markerdown upload server
-
- 使用以下脚本推送博客更新
1 | hexo g -d |
使用博客插件在 md 中引入图片资源(网站、vscode 均可用)
- sh 脚本
1 | npm install https://github.com/CodeFalling/hexo-asset-image --save |
- 渲染库安装
1 | npm un hexo-renderer-marked --save |
- 主题库安装
1 | npm install hexo-theme-next |
- 更换电脑 修改key信息(github)
1 | ssh-keygen -t rsa -C "youremail@example.com" |
See also
about me 个人微信

wechat offical 微信公众号